
KEEPING
DELTAS
DRIVING
Lancia Delta Integrale specialists and enthusiasts
Engine out
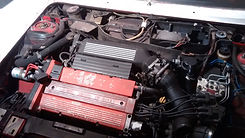
The idea of creating this website was to share our love of the Lancia Delta, also to share our enthusiasm for fixing these cars ourselves. The Delta is a complicated car, designed and built by dedicated Italian craftsmen, with all their engineering flair and imagination.
Part of the enjoyment of fixing our own Deltas, is discovering how these Italians overcame the problem of making a small family car into a rally champion. The compact engine bay is packed with stuff!
Because the engine bay is so crowded, removing the Delta's engine makes maintenance on that engine much easier, but this removal is a daunting task. However, it's only nuts and bolts, and the well deserved sense of achievement when the motor is on the floor in your workshop is very rewarding.
I've done this job a few times, but so much else happens between these rare occasions, it's like doing it for the first time! We are sending this Delta for a repaint, I'm lazy, but I was out voted and the engine must come out. It will be much better with a lovely fresh engine bay.
So here is a beginner's guide, by a beginner! to remove a Lancia Delta engine.
It's a daunting task! Look at it as character building.
This Delta is being repainted, so the bumper, lights, radiators, turbo, exhaust manifold and exhaust pipe, and the battery are already removed, you will need to do this, the headlights can stay in if you're not repainting. Also remove the bonnet. Besides spanners, screwdrivers and a socket set, you'll need a Tippex pen, masking tape and a felt tip pen. You must label every pipe and plug, you think you'll remember, but you won't!
Firstly, drain off the engine oil.
Next remove the air filter box, disconnect the plug leads after marking them, then all the air pipes. Take off the pipes, then remove the oil condensing canister.
Next remove the battery tray, but before you do, jack the front of the car up. Support the car well then remove the front wheels, do this now because there's a bolt from the battery tray inside the wheel arch.
Then remove the cam belt end engine stay bar, and engine mounting assembly also. You will need the room!
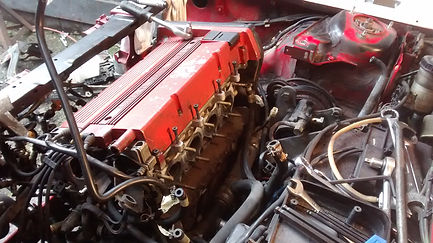
Inlet manifold removed
Inlet manifold removed
Use a jack to support the engine underneath now, you can adjust the height of the engine with the jack when removing the mountings
When the back of the engine is clear, go to the oil filter housing.
Remove the 6 bolts securing the casing, unplug the sensors, then drop the front suspension mounting plate, the bolts have nuts above them. Then undo the motor mount, mine was split, you wouldn't know this without removing the mount.
Remove the driver's side front susp corner plate and mounting. The gearbox is supported with a large mounting above it, this has a long bolt in the middle, 4 bolts holding it to the body and 4 bolts on the end of the gearbox. Take off as much as you can for clearance.
Now disconnect the clutch fluid pipe, this has a swivel end nut, so is easy to remove. Take off the pipe mounting bracket too.
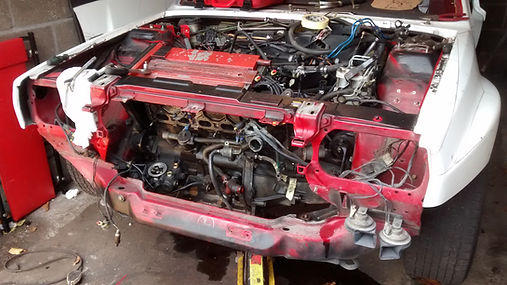
Engine bay, ready to be emptied
Things will start getting clearer now, remove the air con pump, (the air con should be emptied by a pro first) pipes and fuel pipes, take the relays off the cardboard partition and remove all the pipes and wires that are clipped to the cardboard. You can take the water tank off now too.
Unscrew the self tappers at the ends of the partition and pull it up and out. This isn't easy, it'll get caught on the heater etc. but keep pulling.
This allows access to the inlet manifold, the lower nuts are tricky, the abs end manifold mounting stud has a bracket from a water pipe on it too, you have to bend that away to remove the manifold.
.
Starter and alternator wires need
removing, and other bits and bobs
you'll see. Then undo the 2 gear
selector links, this is a bit tricky,
a torch is handy.
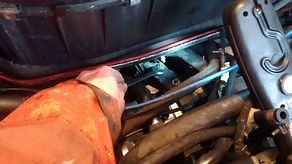
Undoing gear linkage under heater
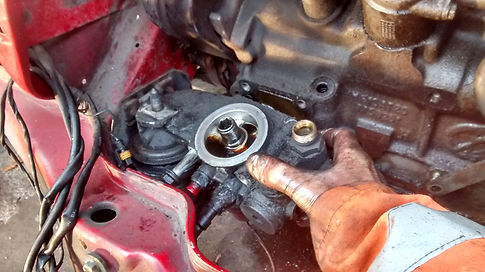
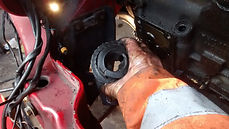
Oil filter housing removal
You'll be finding your own way by now, there's just the prop shaft and rear mount to undo
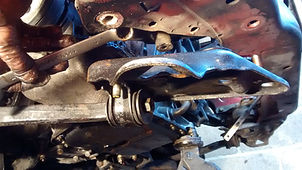
Front wishbone mount
Front suspension mounting
To remove the propshaft, first jack up the rear of the car, so the wheels are off the ground, support very securely, you're going underneath.
Take an allen key and a 13mm spanner, this is guite tough, you can't get the ring spanner on the nuts, so put the open-ender on the nut and turn the shaft with the allen key until the spanner locks on the chassis, then take another spanner, put the ring end over the allen key and use the extra leverage to undo the bolt, repeat till all done.
Next is the back tfinal drive mount, slacken off the big bolt, then undo the 2 nuts and 1 bolt holding the mounting plate to the final drive, pull it away, you'll see what to do when you're down there.
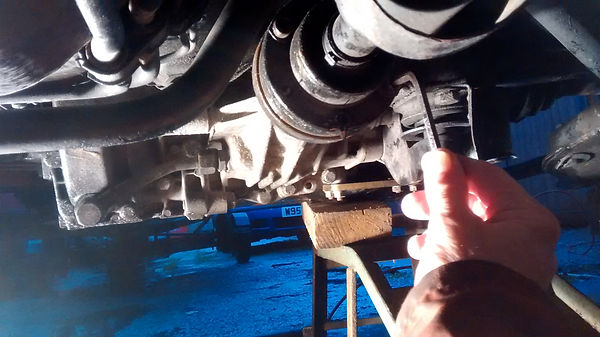
Prop shaft undoing
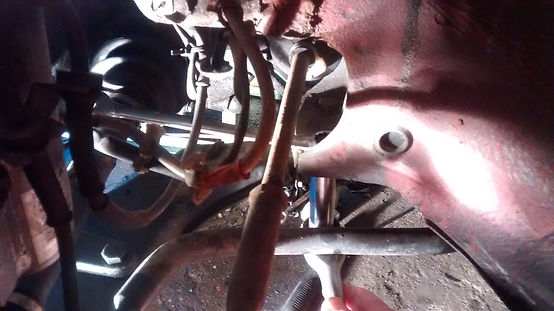
Rear suspension mount
Undoing rear end of wishbone
I'm taking the suspension off with the engine
to refurb it, and allow painting under the car.
To do this, proceed with removing the susp mount bushes, anti roll bar mountings and wishbone drop links. Disconnect the brake lines and remove the anti lock sensors, then undo the shocker top mounting bolts.
If you're leaving the suspension on, still undo the wishbones for clearance, undo the driveshafts at the gearbox end, but leave the shockers in place to support the hubs etc on the car.
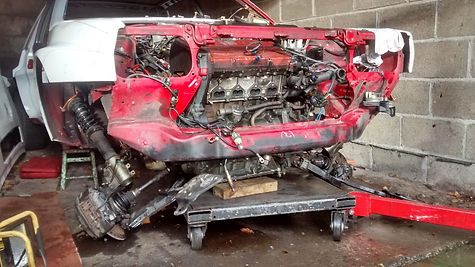
Put the back wheels back down. Rope up the engine and lift it off its support with your engine crane, remove the support and put your trolley under the engine, lower the engine onto the trolley.
Undo the rope, lower the crane and tie it around the car's lower front cross member, lift the car up and slide the engine out, lower the car back down onto axle stands
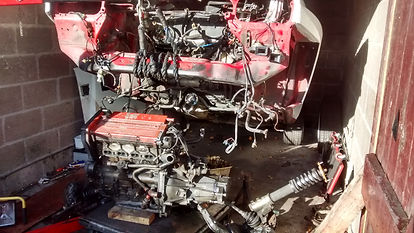
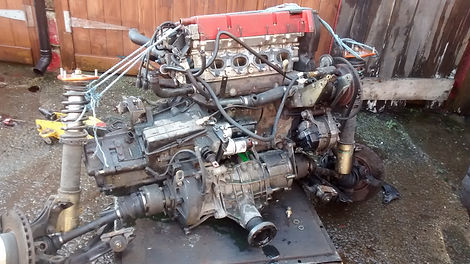
The engine should then be on the trolley, and the car body on blocks. This obviously needs a lot of manipulation on the job, and I've missed out a good few little issues, but you will easily sort this out.
I've just done this job, on my own, in the lock up, and it's taken
a day and a half, about 10 hours.
The hole in the front then looks like this.
Usually unseen items are revealed, the steering gaiter was split, easily repaired now. I'll do the belts and water pump, clutch and the leaking rear pinion seal are all easily accessed.
The alternator is now easily removed, so I'll get it cleaned and serviced
Although this car is from Japan, there are rust issues under the brake fluid bottle which can now be sorted.

An empty engine bay

I've simplified this a bit, it is a difficult operation, and you've then got to put the engine back in again!
But it is do-able.
Haulin ass behind a motor you've fitted, is a proud feeling. This is what we want at Integralingham,
we love Integrales, but we don't want to be
scared of them
More moaning is coming up, so instead you might like to see a video of Jane's Addiction singing
'Just Because', here it is...
Continue reading below if you enjoy a grumpy old man complaining...
A confession! I didn't obey my first car buying rule, that is, don't make assumptions.
Just because there are cam belt cardboard boxes with old cam belts in them, it doesn't mean new cam belts have been fitted to the car you've just bought. Just because it's logical, doesn't make it so.
Just because you'd like to think that someone else's disused cam belt boxes couldn't find their way into the boot of your car, doesn't mean that is hasn't happened. Don't make assumptions!
Just because....
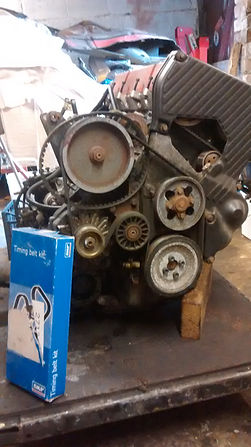
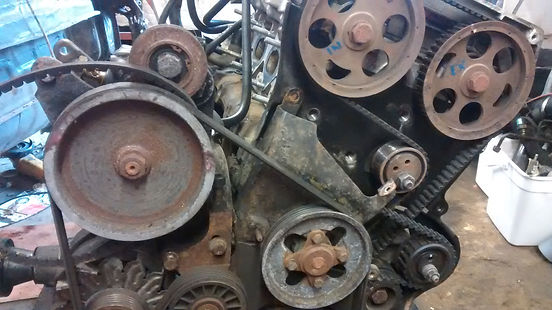
Does this look like an engine that's had a cam belt recently?
No. I didn't think so either!